예전에 학원에서 했던 내용을 다시 시간이 지나서 해봄
(현재 보다는 이전의 버전으로 설치진행)
1. gradle 설치
Gradle | Releases
Find binaries and reference documentation for current and past versions of Gradle.
gradle.org
2. 환경변수 편집

3. cmd에서 gradle을 눌러서 확인하기

4. gradle init
본인이 사용할 프로젝트 폴더에 cmd를 통해서 gradle init을 입력한다.
Select type of project to generate:
1: basic
2: application
3: library
4: Gradle plugin Enter selection (default: basic) [1..4] 2
Select implementation language:
1: C++
2: Groovy
3: Java
4: Kotlin
5: Scala
6: Swift Enter selection (default: Java) [1..6] 3
Split functionality across multiple subprojects?:
1: no - only one application project
2: yes - application and library projects
Enter selection (default: no - only one application project) [1..2] 1
Select build script DSL:
1: Groovy
2: Kotlin Enter selection (default: Groovy) [1..2] 1
Generate build using new APIs and behavior
(some features may change in the next minor release)? (default: no) [yes, no] Enter
Select test framework:
1: JUnit 4
2: TestNG
3: Spock
4: JUnit Jupiter Enter selection (default: JUnit Jupiter) [1..4] 1
Project name (default: git): demo
Source package (default: git): co.com
5. gradle eclipse
프로젝트 파일에 gradle init으로 폴더들이 생겨있는데 거기서 app폴더를 찾아서 들어간다(cmd로)
app에서 gradle eclipse 입력
만약에 bulid 실패시에 => build.gradle 파일을 열고 아래 항목에서 필요한 부분 추가
*자세한 내용 확인은 아래링크에서 할 수 있음 (spring initializr)
plugins {
    id 'org.springframework.boot' version '2.6.0'
    id 'io.spring.dependency-management' version '1.0.11.RELEASE'
    id 'java'
    id 'eclipse'
}

repositories {
    mavenCentral()
}

dependencies {
    testImplementation 'junit:junit:4.13.2'
    implementation 'com.google.guava:guava:30.1.1-jre'
    developmentOnly 'org.springframework.boot:spring-boot-devtools'
    implementation 'org.springframework.boot:spring-boot-starter-web'
    testImplementation 'org.springframework.boot:spring-boot-starter-test'
}

group = 'com.items'
version = '0.0.1-SNAPSHOT'
sourceCompatibility = '17'

repositories {
  mavenCentral()
}

tasks.named('test') {
  useJUnitPlatform()
}
*app 폴더이름 변경하고 싶으면 build.gradle에 다음 항목 추가 후 gradle eclipse 다시 진행
// eclipse 프로젝트 이름을 설정하기
eclipse {
	project {
		name = "java-lang"
	}
}
6. eclipse 프로젝트 import
import projects => gradle init 했던 프로젝트 선택 (하단에 체크박스 체크)
7. gradle init만 되어있는 경우에
위 링크들어가서 dependency 확인하고 추가
8. App.java 실행해서 스프링부트 실행 확인하기
port 설정이 8080으로 확인하면 되지만 혹시 안된다면
application.properties에서 port 설정을 한다. ( server.port = 8000 )
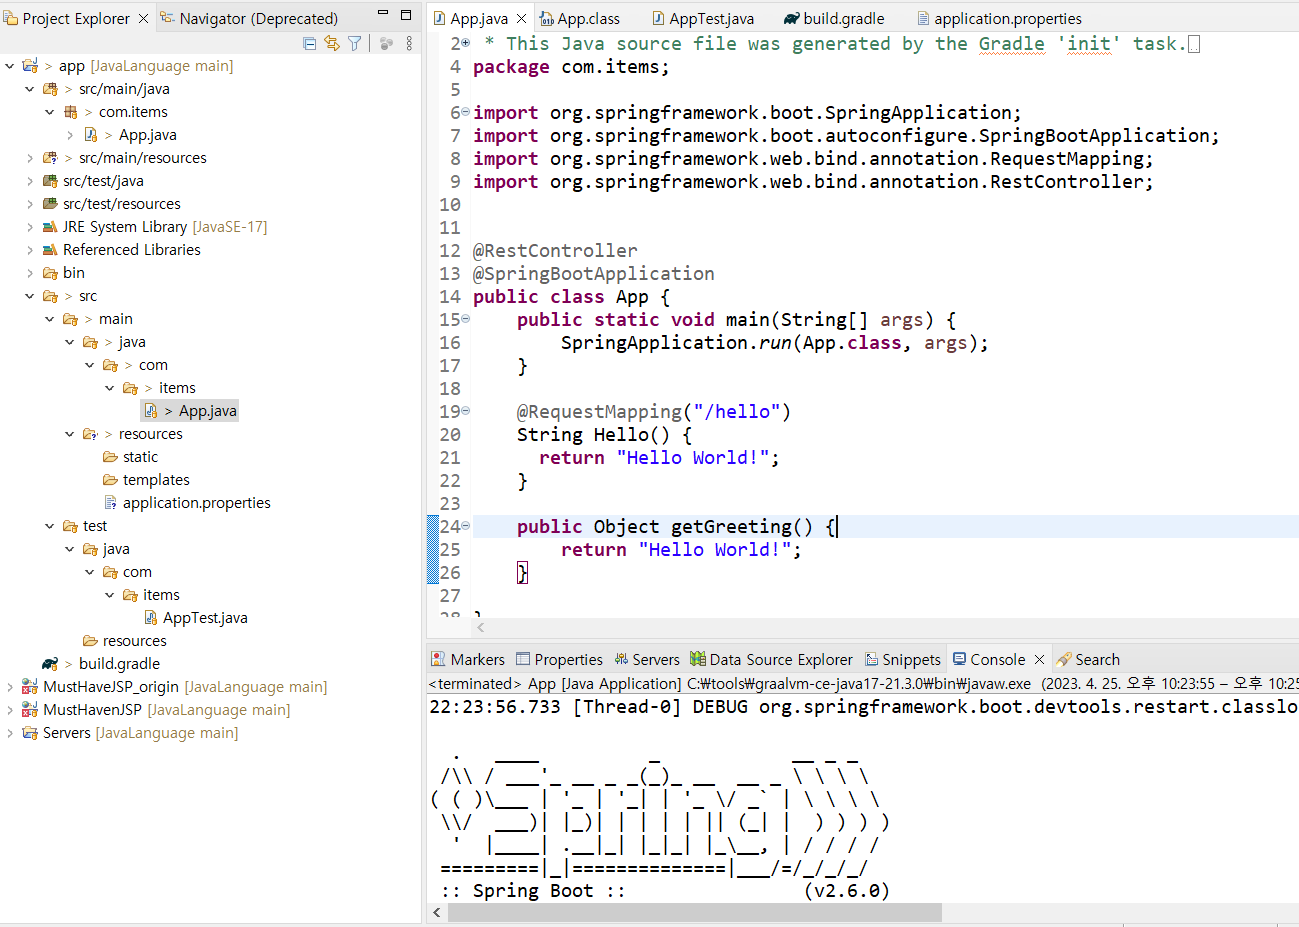
9. 호출해보기
localhost:8000/hello

'JAVA' 카테고리의 다른 글
| 공공데이터 포털 serviceKey 인증 error (0) | 2023.06.27 |
|---|---|
| gradle oracle mybatis 설정 (0) | 2023.05.02 |
| 특정범위 배열 복사 (0) | 2022.02.04 |
| GRASP (General Responsibility Assignment Software Patterns) 패턴 (0) | 2022.01.25 |
| [동현] 계산기 만들기_2 (0) | 2021.10.25 |